How to Join Your Online Course: CTD (Non-credit)
These instructions are intended for CTD (Non-credit) students.
If you are a Dawson employee enrolled in a CTD course, your employee username/password is NOT associated with the course and must not be used. You must log in with student credentials provided.
Step 1 - Know your student login credentials
Students enrolled in online classes receive a confirmation email from the CTD department approximately 24 hours before the course starts.
The email is from ctd@dawsoncollege.qc.ca with a subject line “Welcome to CTD’s Non-Credit Courses”.
Attached in the email is a PDF file with your login information.
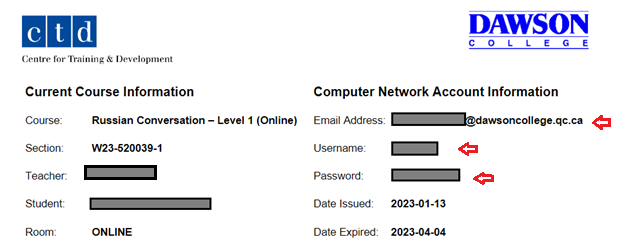
If you didn’t receive the email by the day of the course or require CTD to resend it, please contact the CTD Office.
Before contacting the CTD Office, please check your spam/junk folder as the email may end up there.
Step 2 - Enable MULTI-FACTOR AUTHENTICATION to access Office 365
Dawson is using Multiple Factor Authentication (MFA) to improve the security when logging to Office 365.
For an easier authentication process, we suggest that you use the text message (SMS) method.
Using Text Message (SMS) for MFA
Open a browser (Please use Microsoft Edge, Chrome, or Firefox. DO NOT use Safari.)
Go to https://login.microsoftonline.com/ and login with your Dawson email address and password. If you don’t know your login credentials, please go back to Step 1.
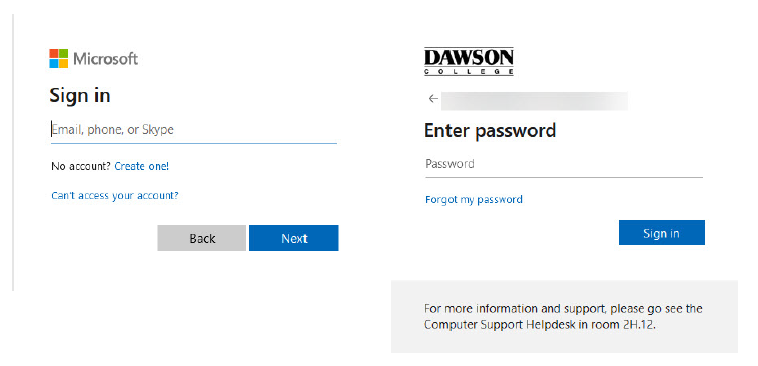
Click “Next”
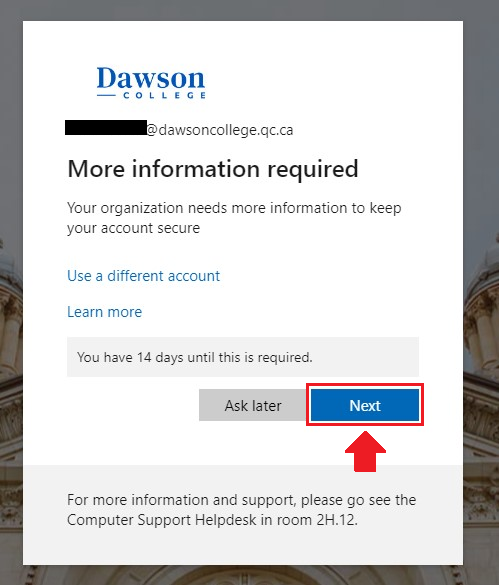
You will be prompted to use an authentication method. Click on “I want to setup a different method” as shown below:
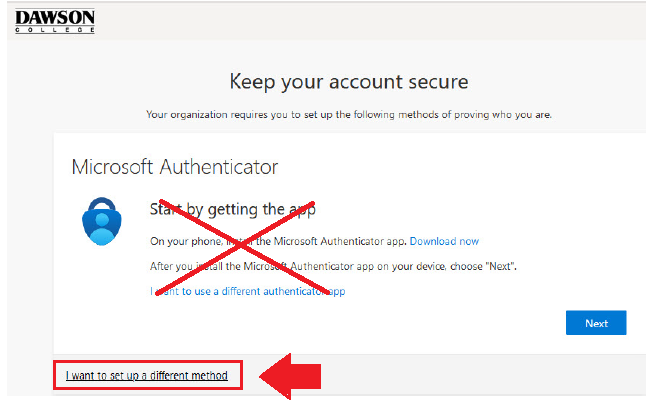
By clicking on the link, you will see a pop-up with 2 options: Phone and Authenticator App. Choose Phone and confirm.

You will need to provide your cellphone number and select “Text me a code” to receive the authentication code via text message.
** If you have a landline phone instead of a cellphone, select the option “Call me”. You will receive an automated call from the Microsoft Sign-In Verification Service asking you to confirm your log in by pressing the ‘#’ key **
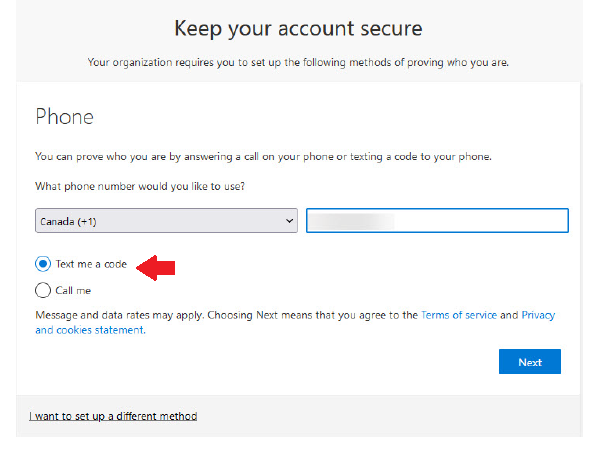
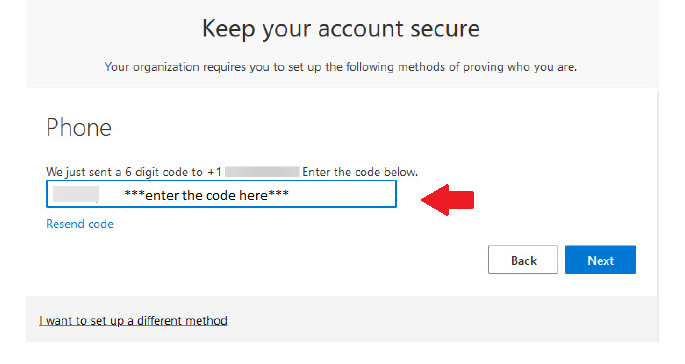
We selected “Text me a code”. On the next screen, you will need to type the code received via SMS.
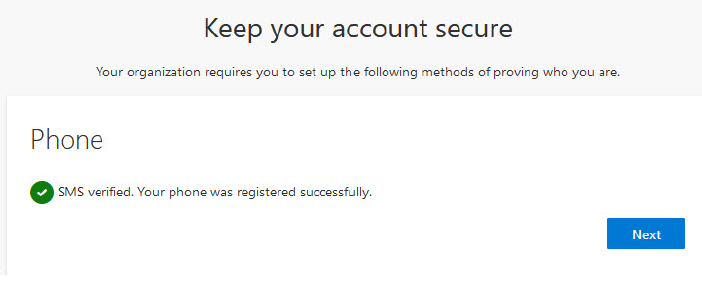
After typing the code, your phone is registered successfully.
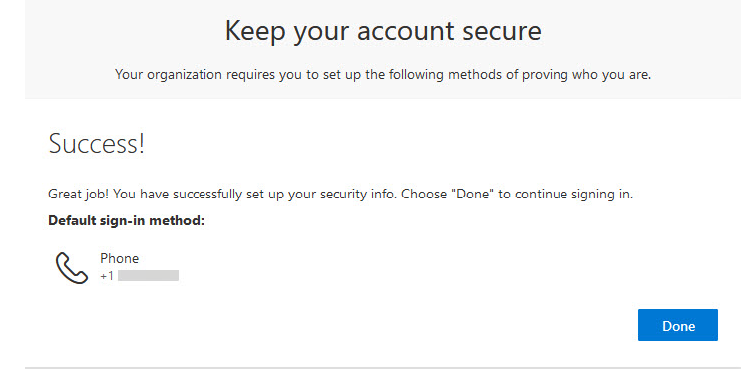
Now, just click on Done to continue to Office 365:
Other Authentication Methods
If you prefer to use a different type of authentication method (Microsoft Authenticator app or Browser Authenticator), please follow the link below and consult the video or the pdf file under ‘Student-Instructions’
Step 3 - Access your Teams link via Moodle
On the same web browser from Step 2, open a new tab and go to https://moodle.dawsoncollege.qc.ca.
Click on the Office 365 button and log in with your Dawson email address.
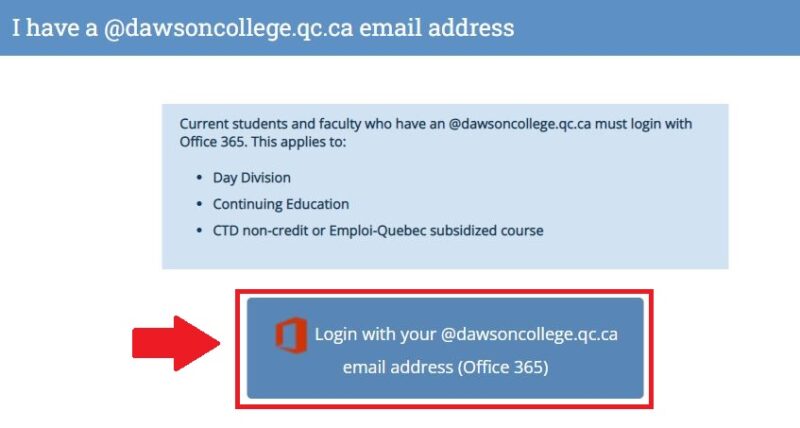
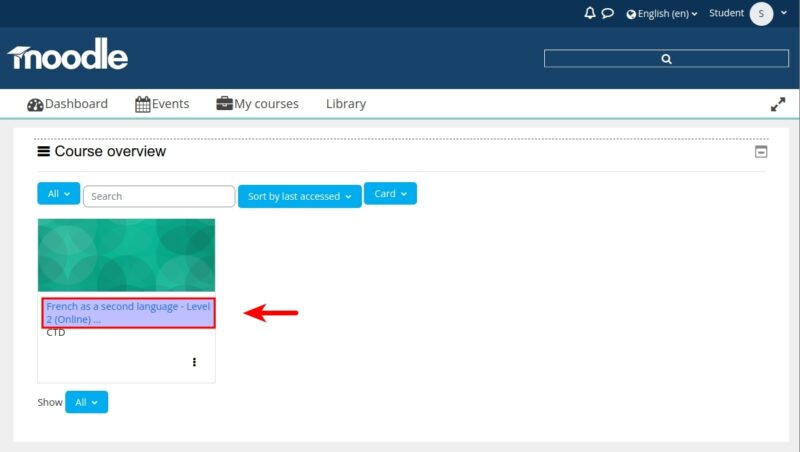
If you’re not on the Course overview page, go to the My courses menu and select your course.
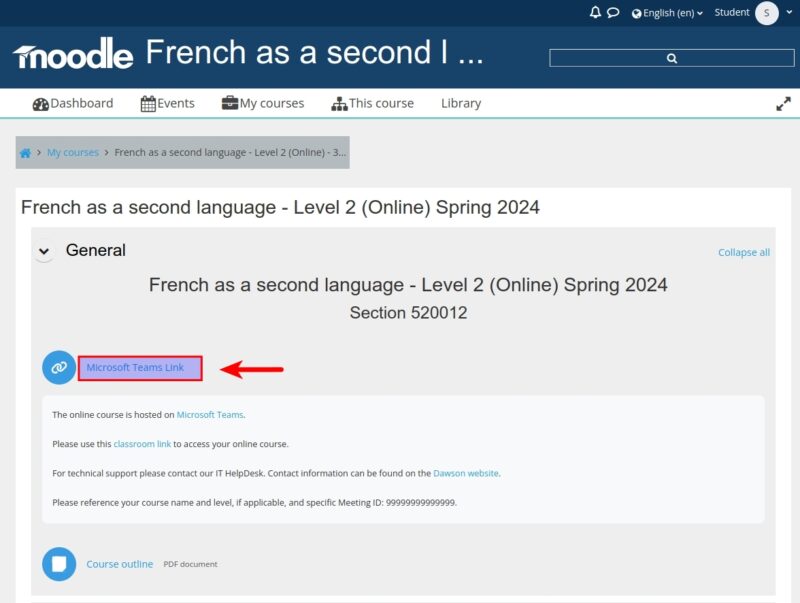
In the first section on the course page, find the link that says Microsoft Teams Link and click it.
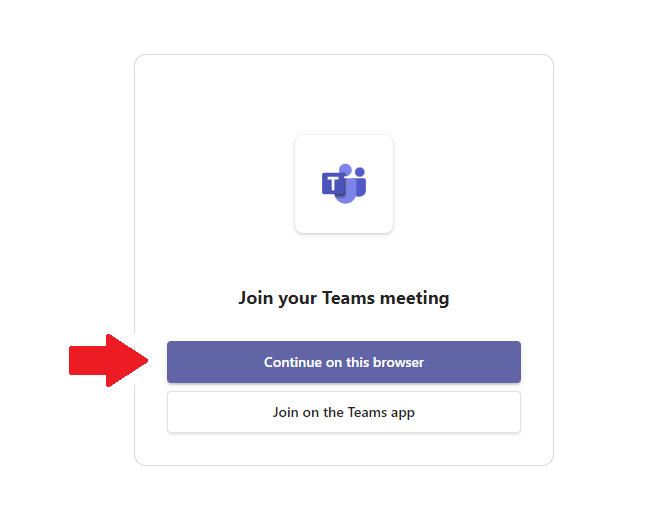
Select Continue on this browser.
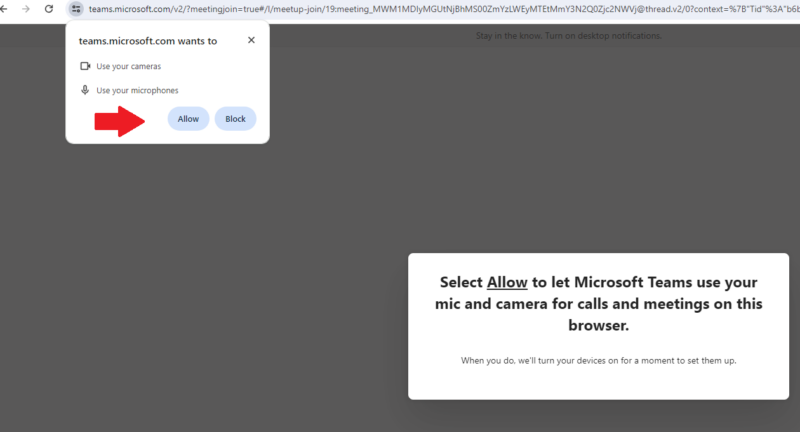
If prompted, click on Allow to let Microsoft Teams use your microphone and camera.
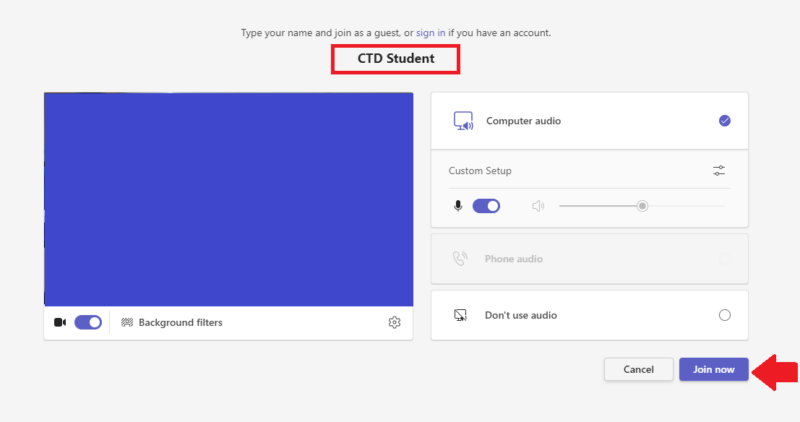
Click on Join Now.
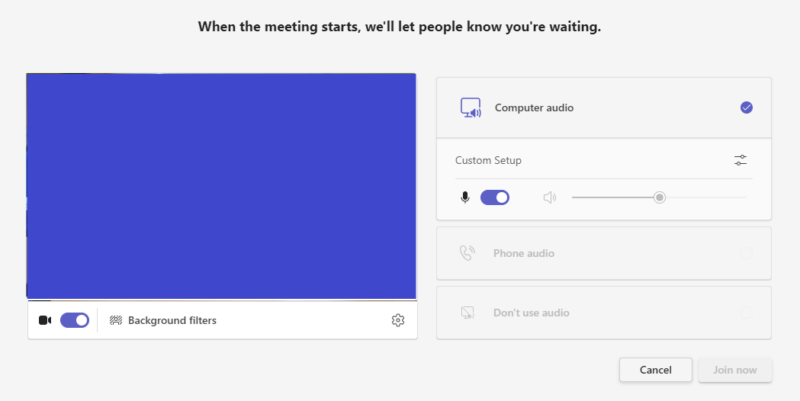
Wait for your teacher to add you to the class from the Teams lobby.
Step 4 - Install VMWare Horizon (For online technology courses only)
VMware Horizon
The VMWare Horizon client is used to open a desktop session on one of the college computer labs, meaning that you will have access to a Windows machine remotely with all the apps and features that are required for your course. CTD Online technology courses like Adobe, Autocad, Solidworks, Excel, etc. will connect with VMware.
Installing the VMware Horizon client
Open a web browser and go to https://viewsec.dawsoncollege.qc.ca
Click on “Click here to Download VMware horizon Client”. The HTML Access is currently disabled.
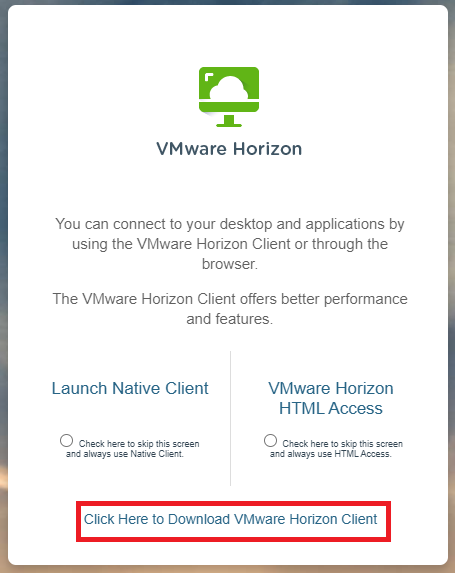
Download the correct client from VMware. For mobile device users, it can be found in the respective Appstore by search for “VMware Horizon Client”

Install the client once the download is done
Connecting to VMware Horizon
Launch the VMware Horizon Client
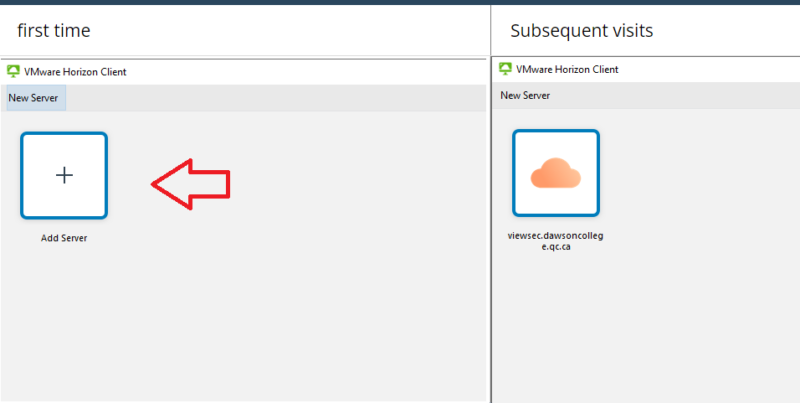
The first time you launch the client you will need to add a server to connect to. If you have already done this, skip this part and double-click on your existing server
Click on “Add Server”
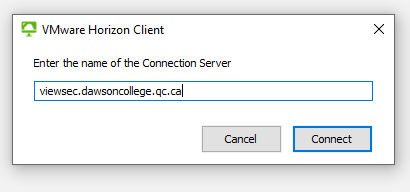
Enter “viewsec.dawsoncollege.qc.ca” and click connect:
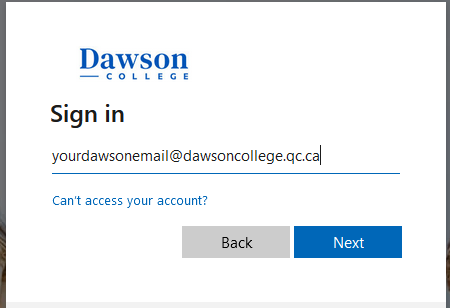
Log in with your Dawson email address and password:
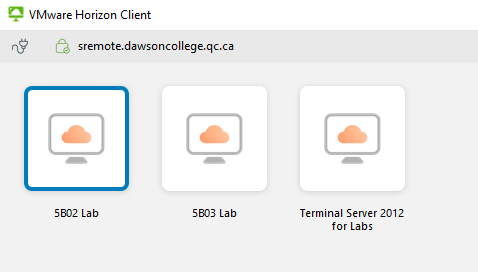
Choose the lab you want to access.
